Scrapbooking SOS - is all about why I scrapbook. I scrap for me, my sanity and
for my creativity. Of course, my family benefits from it too.

Thursday, June 19, 2014

A Father's Day Card

Here is my Father's Day Card - I made this one for my Husband!


Inside I wrote this sentiment:
"Happy Father's Day! May we continue to build our future and life together!"

Which was perfect since we are house and/or land hunting! Plus, if there is a land option figuring out floor plans and designs.  

Monday, June 9, 2014

A Virtual Blog Hop


I received an e-mail from an extremely inspiration-ally talented designer and writer, Cindy deRosier. She asked me to participate in her blog hop last week! My first thought was: sounds fun. I haven't done a blog hop in awhile. So, here I am honored to accept that invitation. Especially, after reading more about the details and seeing how this blog hop is different from the usual blog hops. This virtual blog hop gives me the chance to show progression of my creativity and write a bit so you can get to know more behind the pages you see me create. Here are the questions I got to write about:

1.) What am I working on now?

I am working on a special little project for my future Nephew arriving in July. I have the printable letters cut and attached to the burlap pennants that I cut from a burlap table runner. I started out with different burlap but it was to loose of a weave. So happy when I found the runner with a tighter weave. All are stringed all up with jute twine.


 Now, just need to add some baby boy accents. Which what I am currently working on.

I am also designing a page for the upcoming XOXO Scrapbooking DT Challenge. All I can say is it is my own coined scrappin' style just add BOY! And I have one of those!

I really enjoy working on this team! The members are awesome, inspiring and they challenge me. I can't give you a sneak peek! BUT you can alway join our monthly challenges over at XOXO Scrapbooking!

...I have finally just finished unpacking and getting things back in order from a weekend long retreat I went to in May. I worked on my Honeymoon Album finally after 9 years. Of Course, I am always in the process if working on my kids albums.

2.) How does my work differ from others?

My work and pages are different from others because I approach each project with my own unique style. I have coined a name/term for my style as: rustic shabby chic. I usually stick with earth- tones and love the distressed look. So, I might use two different distressing techniques or just one by using ink and/or a paper distress-er. (Rustic/Shabby). I love to try out different techniques when I can.

3.) Why do I create what I do?

I create what I do because it is like a therapy in different phases. There are moments you need to Re-Live, Remember, Capture That "Fraction of Time" or simply Escape the daily grind and push through! I find that once the creative mojo is going once I get in my scrap room. I don't want to come out! I get to create to create a book of memories for my children and family!

4.) How does my creative process work?

My creative process varies. I usually start with my photos to get an idea of what & how many I want to include on a page. But sometimes the photos just don't make those creative juices work. That's where I love Challenges and Sketches. The challenges with a list of specific items make me dig into my stash and give the spark of inspiration! The sketches provide a great starting point that you can tweak to fit your photos and have whatever creativity start to emerge. I have found that I have had my favorite pages come to life using a challenge or a sketch. The challenge/sketch I may have started with can also turn out completely the opposite from what I started out with!


WELL, THAT'S IT! I hope you enjoyed reading a little bit about me!


NOW, on to the fun part: I asked scrappy friends to participate with me. Please stop by their blogs for a visit:

Jean Marmo's Bio:
"I am the Mom to two adult children both of whom got engaged this year. Things have been busy with a wedding coming quickly in September. I continue to scrap the new events in their lives such as new jobs, new houses and learning home repairs! I have been scrapping for years. Recently, I began art journaling and mixed media canvases which has been transitioning that into my scrapping. My blog is: Pages in Time"

Kimberly Fordyce's Bio:
"I married my high school sweetheart, have 3 grown children and 3 amazing grandsons! My family has been very supportive of my scrapbook habit. My daughter and son-in-law bought me my first baby Cricut, encouraged me to start a blog and enter into challenges. I have been hooked ever since! I started my first blog Crazy About Scrappin' and then took some time off after a few years. Started my newest blog: Kim's Scrapbook Addiction. I enjoy visiting my blogging friends and being inspired. I'm always looking for new friends and challenges to enter."

Lori Apgar's Bio:
"I am married and have 3 dirty, stinky boys! I run an in-home daycare in my basement and have been crafting since I could cut with scissors. I have been scrapbooking for 17 years and so much has changed over that time!! My boys are 24, 19 and 8! I got my first Cricut shortly after the baby was born and my gypsy a few years later. I really got creative then and started teaching classes. I currently am on 3 Design Teams which helps me to finish the projects I start!! I also try to sign up for 2-3 blog hops each month. I love challenging myself and recently started selling some of my work in two different shops (part of my retirement plan)!!! My blog is: Scrappin' My Stress Away"


Monday, May 26, 2014

Digging out old photos and scrapbook challenges

I was digging through a pile of doggie photos that were in a photo box. I came across some that I never scrapped. Ended up making two different pages. One I have to wait to show. But here is the second one!


The full page:

I was looking for some challenges to get me going. Here is one I found over on Stuck?! Sketches. It is actually a sketch created by Laura Whitaker from her blog post.

Here is the sketch:

Monday, May 19, 2014

Found these Greeting Cards with instructions.

Found these Greeting Cards with instructions figured I should post them since we are just feeling the Spring here!
Quick & Easy Greeting Cards

Heart Shaped Butterfly Greeting Card

 What an elegant way to send a personal greeting. This silver and white heart shaped card features velum butterflies, silver foiled wood grain paper, and glitter silver vines.

Instructions

1. Use a paper trimmer to cut white cardstock to 6 x  12”. Score in the middle with a scoring board and bone folder and fold in half.
2. Down load and print out the heart template.
3. Cut out heart template with scissors and/or craft knife, lay template over card front with fold at the top so that the tops of the heart just overhangs the fold of the card by approximately 1/8” and use a pencil to trace the outside edge of the heart onto the card. Use scissors to cut along the pencil lines to create a heart-shaped card base.
4. Lay the heart template onto wood-grain paper and trace around outside edge with a pencil. Cut along pencil line with scissors, and adhere to card front with dry adhesive.
5. Lay the heart template on grey paper and trace along both outside and inside edges with pencil. Use scissors to cut around the outside edge of the line, and a craft knife to cut along the inside line. Erase any pencil markings left behind with an eraser.
6. Place several adhesive foam squares along the back side of the heart cutout, peel off their release paper, and place over the card front. This raised heart is where the vines will be attached.
7. Use a vine edge punch along the edge of grey paper. You will need two 12” strips of vine.
8. With scissors cut the long strips into several small pieces about 1 1/2” long. Apply white glue to the backs of the pieces and adhere vines to the heart frame, starting at the bottom and making your way around to the apex of the heart.
9. Apply glitter glue to the tops of the vine and sprinkle with coarse glitter. Shake off excess onto a scrap piece of paper and return to the container.
10. Use a silver glitter pen to trace around the velum wings of a large, small, and extra small butterfly sticker.
11. Place two blue gems on the body of the large butterfly, and one blue gem on the body of the small and extra small butterflies.
12. Remove the large butterfly from the release paper and adhesive foam square to the back of the top left wing. Apply the powder tool to the sticky side of the top left wing and then remove the release paper from the adhesive square. Place the butterfly on the bottom right side of the heart.
13. Remove the small butterfly from the release paper and place it to the top left of the heart.
14. Remove the extra small butterfly from the release paper and place it to the top left of the heart, so that it overlaps the small butterfly slightly. 


Glitter Garden Greeting Card

 Capture the sparkling dew of a spring morning with our “Glitter Garden” greeting card. Simply apply glitter to any floral paper. The transformation from plain to sparkling is mesmerizing and so easy to do.

Instructions

 1. Select a cream piece of paper from the paper pad. Use a paper trimmer to cut cream cardstock to 4 1/4”x11”. Score down the middle with a scoring board and bone folder. Fold in half to make the card base.
2. Use a paper trimmer cut a piece of flower/vine patterned paper to 4”x 5”.
3. Ink the edges of the patterned paper with grey ink and a foam applicator.
4. Use a glue pen along the light green parts of the paper. Sprinkle light green glitter over the glue, and shake off excess onto scratch paper. Work in small sections until all of the light green areas are covered with light green glitter. Return excess glitter to container.
5. Use a glue pen along the dark green parts of the paper. Sprinkle dark green glitter over the glue, and shake off excess onto scratch paper. Work in small sections until all of the dark green areas are covered with dark green glitter. Return excess glitter to container.
6. Use a paper trimmer to cut burgundy paper to 4 1/4” x 5.1/4”. Adhere the glittered paper to the center of the burgundy paper with a tape.
7. Use scissors to cut a piece of green ribbon to approximately 18”. Wrap the ribbon around the glittered piece, about 1 1/2” from the top edge of the piece and tie a bow. Cut a “V” in the ends of the ribbon with scissors.
8. Adhere the glittered piece to the center of the card front with a glue runner.
9. Remove large and small pink heart gems from the release paper and place over the pink flowers of matching size 


Butterfly Cut-Out Greeting Card

 Create an eye-catching butterfly greeting card with easy. This delicate design work well as a note card, birthday greeting, or thank you. Butterflies are cut out and hand glittered.
Instructions
1. Select a pattern paper from the paper pad. This card used the script pattern paper.
2. Use a paper trimmer to cut down script paper to the size of 4 1/4”x11”. Score paper in half with a scoring board and bone folder. Fold paper to create the card base 4 1/4” x 5 1/2”
3. Ink edges of front of card with grey ink and foam applicator. Draw thin line around edge of card front with fine-tipped black ink pen.
4. Punch one small and one large butterfly out of scrap paper as these will be used for a template.
5. Lay card open flat on cutting mat. Lay butterflies on desired location on card front and trace with pencil around wings. Do not complete the entire shape – leave the mid-section blank. Remove the butterflies and use a retractable knife to cut along the pencil line, leaving the body of each butterfly intact. Pinch the wings together with your fingers to give dimension.
6. Apply a thin line of glittering glue around the wings and sprinkle glitter liberally over the glue. Shake off excess glitter onto scrap paper and replace into container.
7. Cut a 3/4”x7” strip of light blue paper with a paper trimmer. Cut v-shaped ends in the strip with scissors. Use a fine-tipped black ink pen to draw a line around the edges of the strip. Folds each end 1 1/2” and 2” to create the banner shape. Adhere banner folds together using adhesive foam squares. Adhere to the card front with adhesive foam squares, approximately 1 inch from the bottom edge.
8. Remove the flower cluster chipboard sticker from the release paper and place on the left side of the banner.
9. Use a black ink pen to write “hello” on the remaining open space on the banner.
10. Use a paper trimmer to cut a 4”x 5 1/4” piece of wood-grain paper. Adhere to the inside of the card with a tape runner.
11. Peel off a butterfly chipboard sticker from the release paper and place it at the bottom right corner of the wood-grain paper.
 

Saturday, May 17, 2014

Retreat: Getting caught up with the Kids.

My daughter's 1st Birthday Photo Shoot Pic

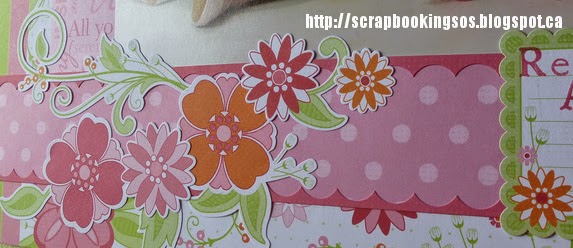
Layering Stickers into a cluster. Also used the leftovers from the scallop cut border with the sticker set. It is the pink placed on the lighter pink polka dot paper. Might add a few buttons to the centers. When I went to place this page in her album. I noticed the joining page had some.

A little strip left from that scallop border.

On to Baby Boy Pages 

Baby Boy arrives- Using up those older supplies in my stash.

Using those old stickers by placing them on same color cardstock, circle punched, and layered with another color in this case it was the kraft cardstock. Title I used rub-ons.

Baby Boy getting weighed

Used a quote from those old vellum Quote Books/Stacks. This one happened to be in a spinal binding. So, I punched some kraft cardstock with notebook border punch. Using Sew Easy zig-zag pierced stitch lines and hand-stitched in light blue making my own embellishment.  

Inked the edges of Cricut cut letters. "Here I Am!" fit so well with his little stretch pic. Funny 4 years later it is the same way he wakes up. A little stretch and "Morning" or "Come on the Sun's up"

Didn't know how to title this one. We were in recovery waiting for a room. So, I just used the vellum saying.

Using the same idea as before: sticker layered cardstock with some ribbon and a button/brad cluster.

Visitor's

Altered the saying for my title and staggered the tile cardstock letters to cover the vellum edge and adhere it the the page. Ric-rac on kraft cardstock hides the top edge of vellum and hides the glue so it stays on the page.

Added some ric-rac to the kraft cardstock to break up the patterns.

Baby Lo-Jack - We joked about this. When my daughter was born 2 1/2 years earlier we never saw one of these. Not sure how the term/title came out. Not sure if the term is universal. But in the USA when they started putting car alarm systems in one was called, LO-JACK. LO-JACK would track your car if stolen. So, in this case it was coined Baby Lo-Jack. Since the picture didn't fit the frame I added the jail bars using Cricut - CTMH Artbooking cartridge.

My 1st cut for the jail bars didn't fit like I wanted them so I found a way to used them and adhere my vellum saying down. Fits because the picture above is my daughter counting his toes.

A play on LO-JACK using a rub-on tricycle.

The full page:

Our 1st Anniversary - dressed up and heading to dinner. Used Webster's Pages Products and A LOT of Fussy Cutting. Placed the picture on top of a overlay/transparency. Positioned fussy cut flowers to cover the space that my photo wouldn't cover.

More Fussy Cutting & overlapped the frame sticker.

Loved this little gazebo. We were married at the foot of a larger gazebo.

Edge distressed tickets and layered with lace.

Vellum journaling ticket and chipboard button layered.

The completed page.


Until next time!

Friday, May 16, 2014

Retreat: Moving on after a cruise...Easter, Beach & Randoms

Our Yummiest stop...so good I never stopped to get a picture of those tasty rum cakes. So I used one from the brochure. Here is Page 1:

Page 2: I think it still needs something. I added the tickets from an ice show we went to that night as we started our journey of a day at sea and back to Florida.

The complete layout - looking at it together I think I will add some navy and some journaling to page 2.


So, after the cruise layouts were completed as best I could with what I had with me. It was time to get some random layouts done that have been planning to do.

Here is a Easter page - the stamp I colored in with marker and fussy cut. added the basket and fussy cut the eggs placed them on top of the image.

My daughter and her 2nd cousin with the Easter bunny. Used CTMH Framework & Keepsake Alpha Stamp Sets. EK Success/Martha Stewart Border Punch & Heidi Swapp Dial Date Stamp.

Next was a 2 page layout that I kept playing with but never just got the tape gun out and made it officially finished! Here are the stamped trees and fussy cut birds.


Matted and finally put those pictures in position! Page 1 - Grandma and my daughter making the peanut butter treat to "Feed the Birds". I kept thinking of Mary Poppins and the bird lady so I just went with it!

Page 2 - A bit hard to see here but as soon as they pulled the cage out the birds came flocking. 

The complete layout

Next up was a trip to the beach page featuring my husband and the kids. LBI - Long Beach Island, NJ

I want to use Mudd Puddles on the title - which is a sand like texture. I used it on a page in the past.

Two pages together

One in the works...I liked how this photo worked with the papers. Have to confirm the date/event to finish and title.

I scrapped the pics but wasn't sure of the details. So, now that I am home I got him to fill me in. My husband when he was Ironworking in Boston before we met!

I made the steel beams by scoring the cardstock and adding some pastels to the centers.